Generating Your MCP Credentials
MCP access requires an active trial, an active Enterprise subscription, or specific enablement for your workspace. You must have the Owner, Admin, or Member role; Viewer and Collaborator roles cannot access MCP.
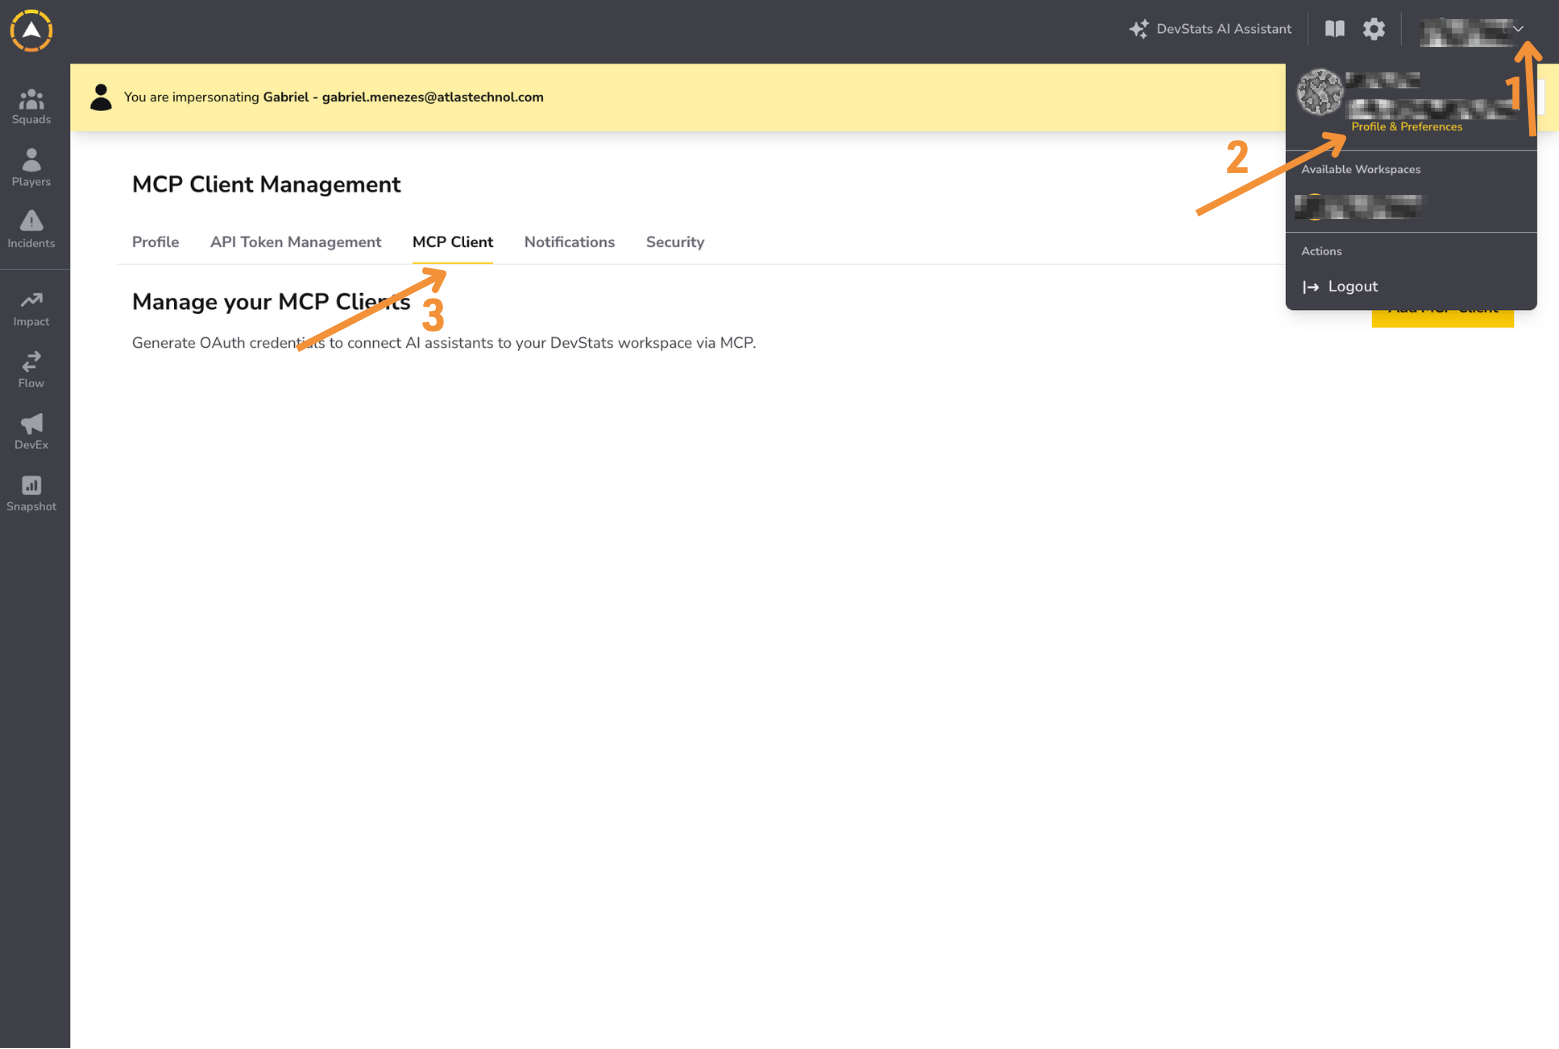
Step 1: Click your profile in the top right corner and go to Profile & Preferences. Click the MCP Client tab.
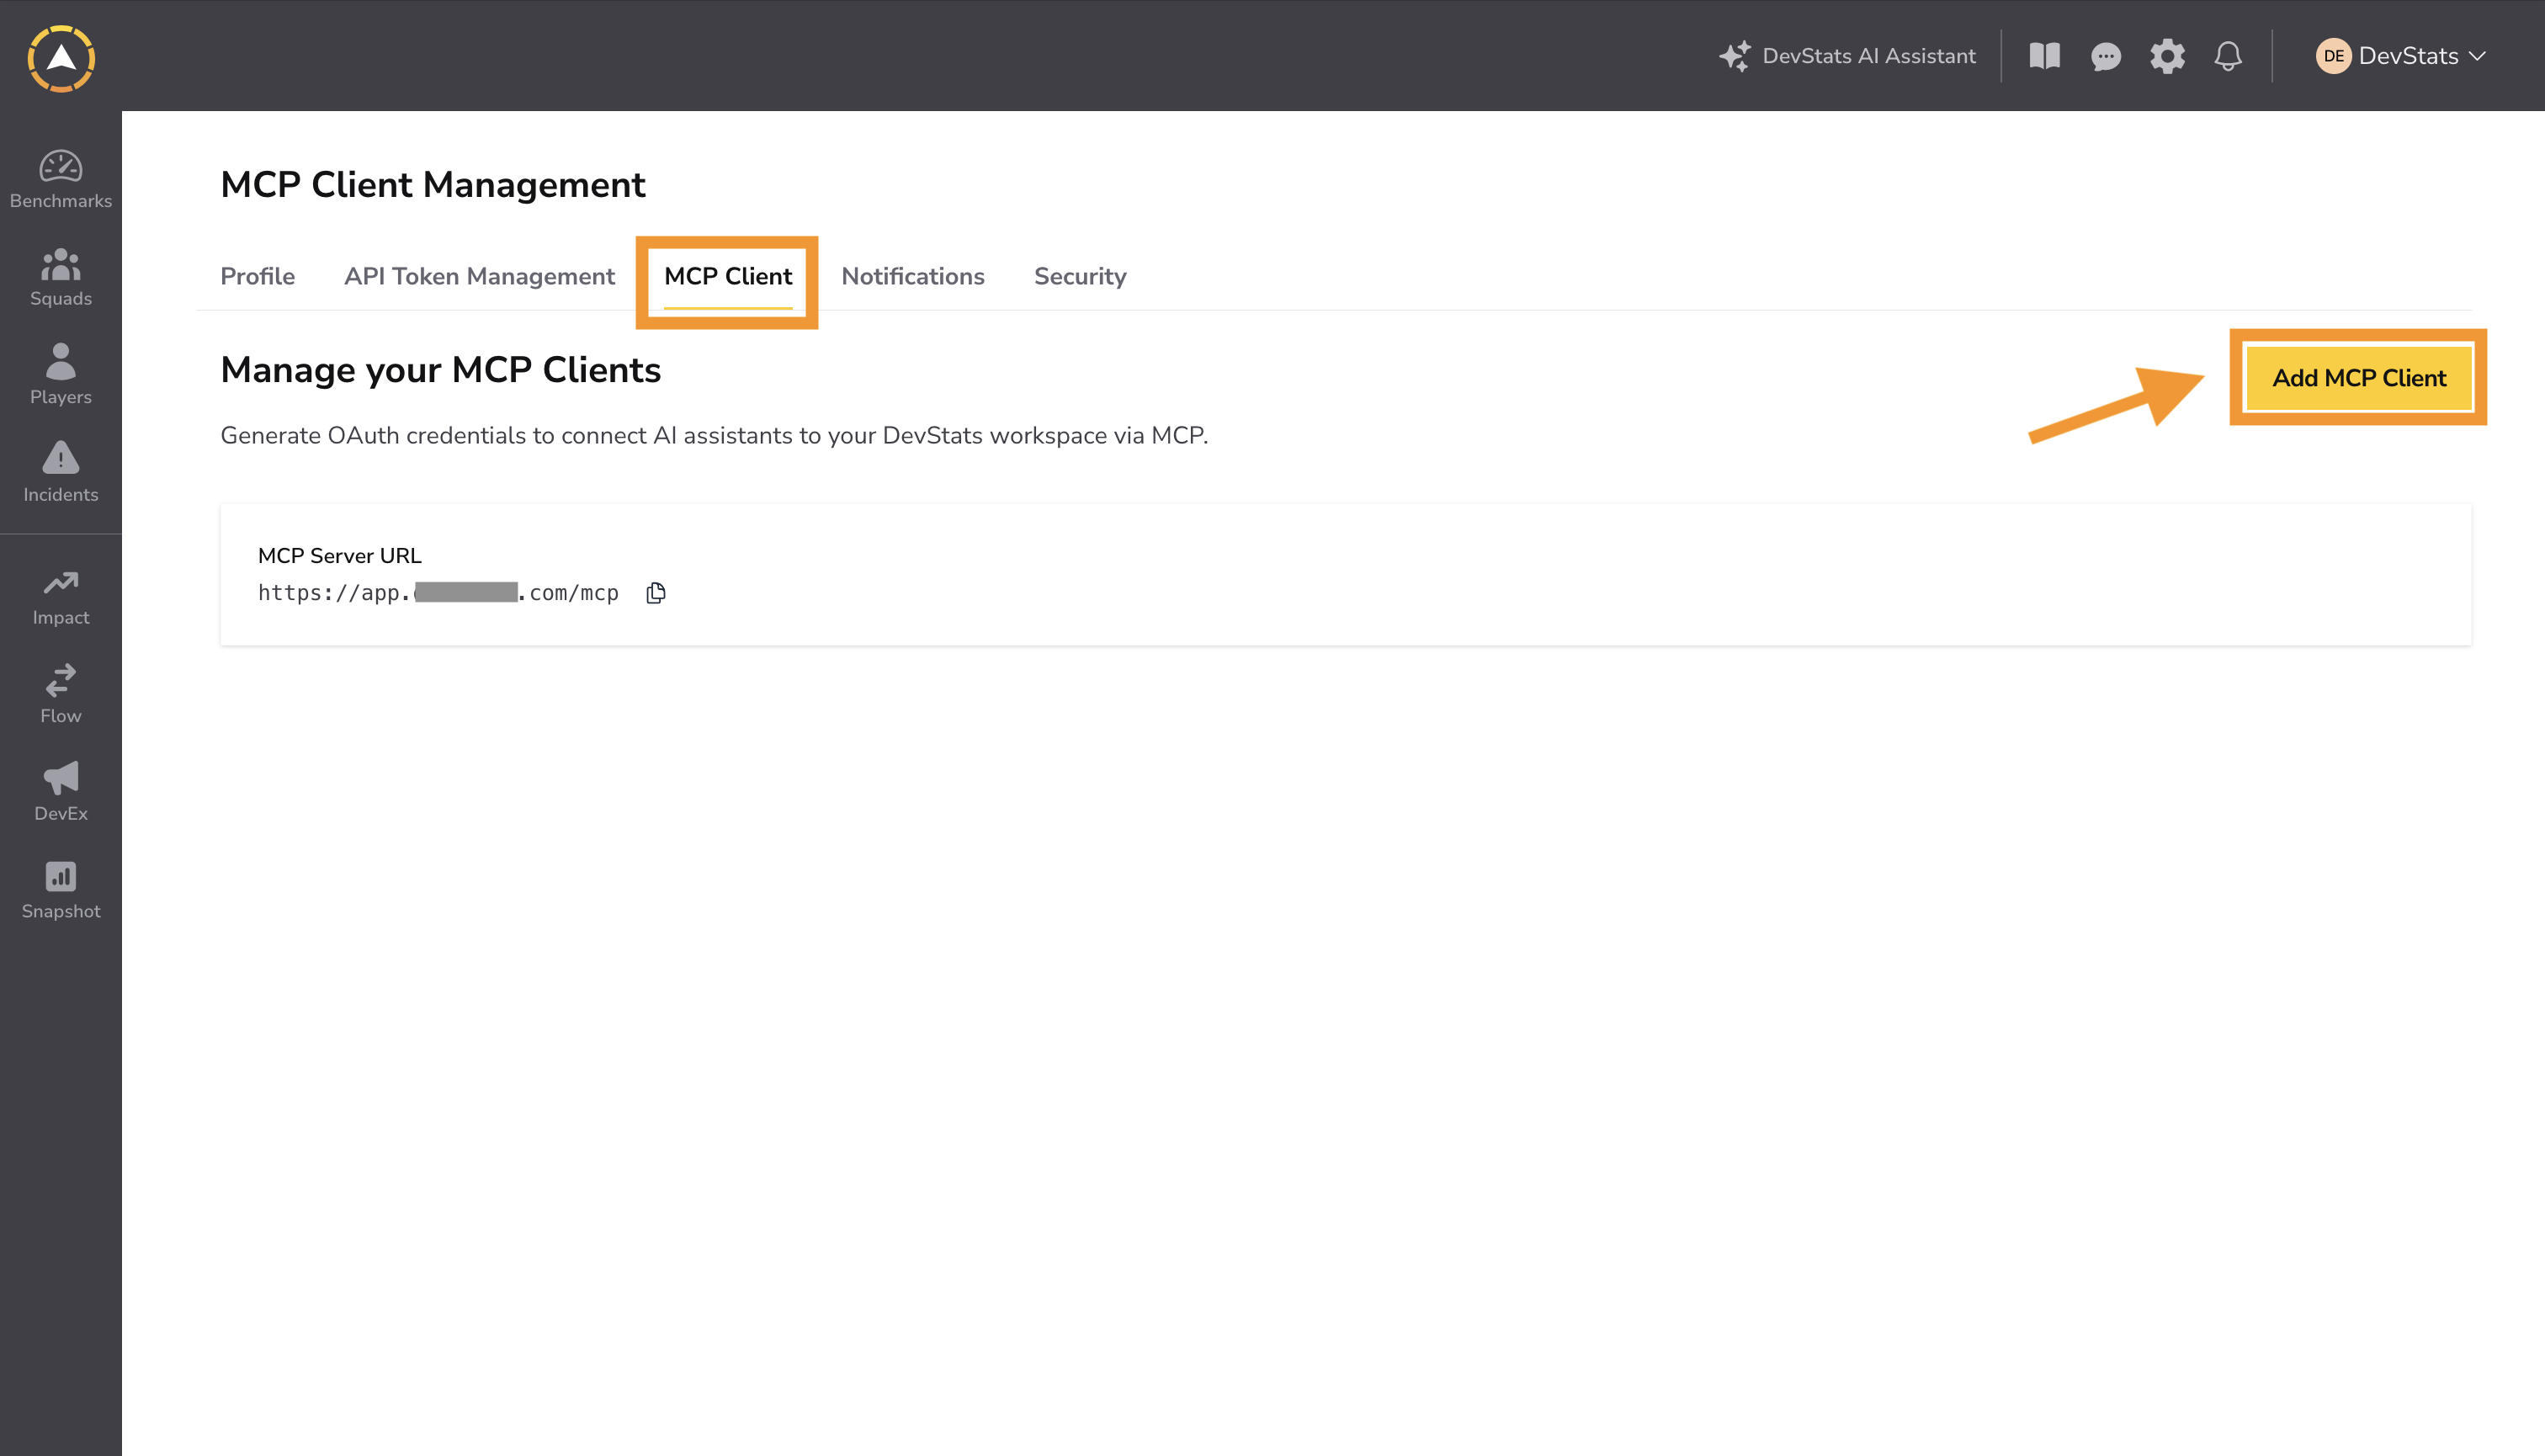
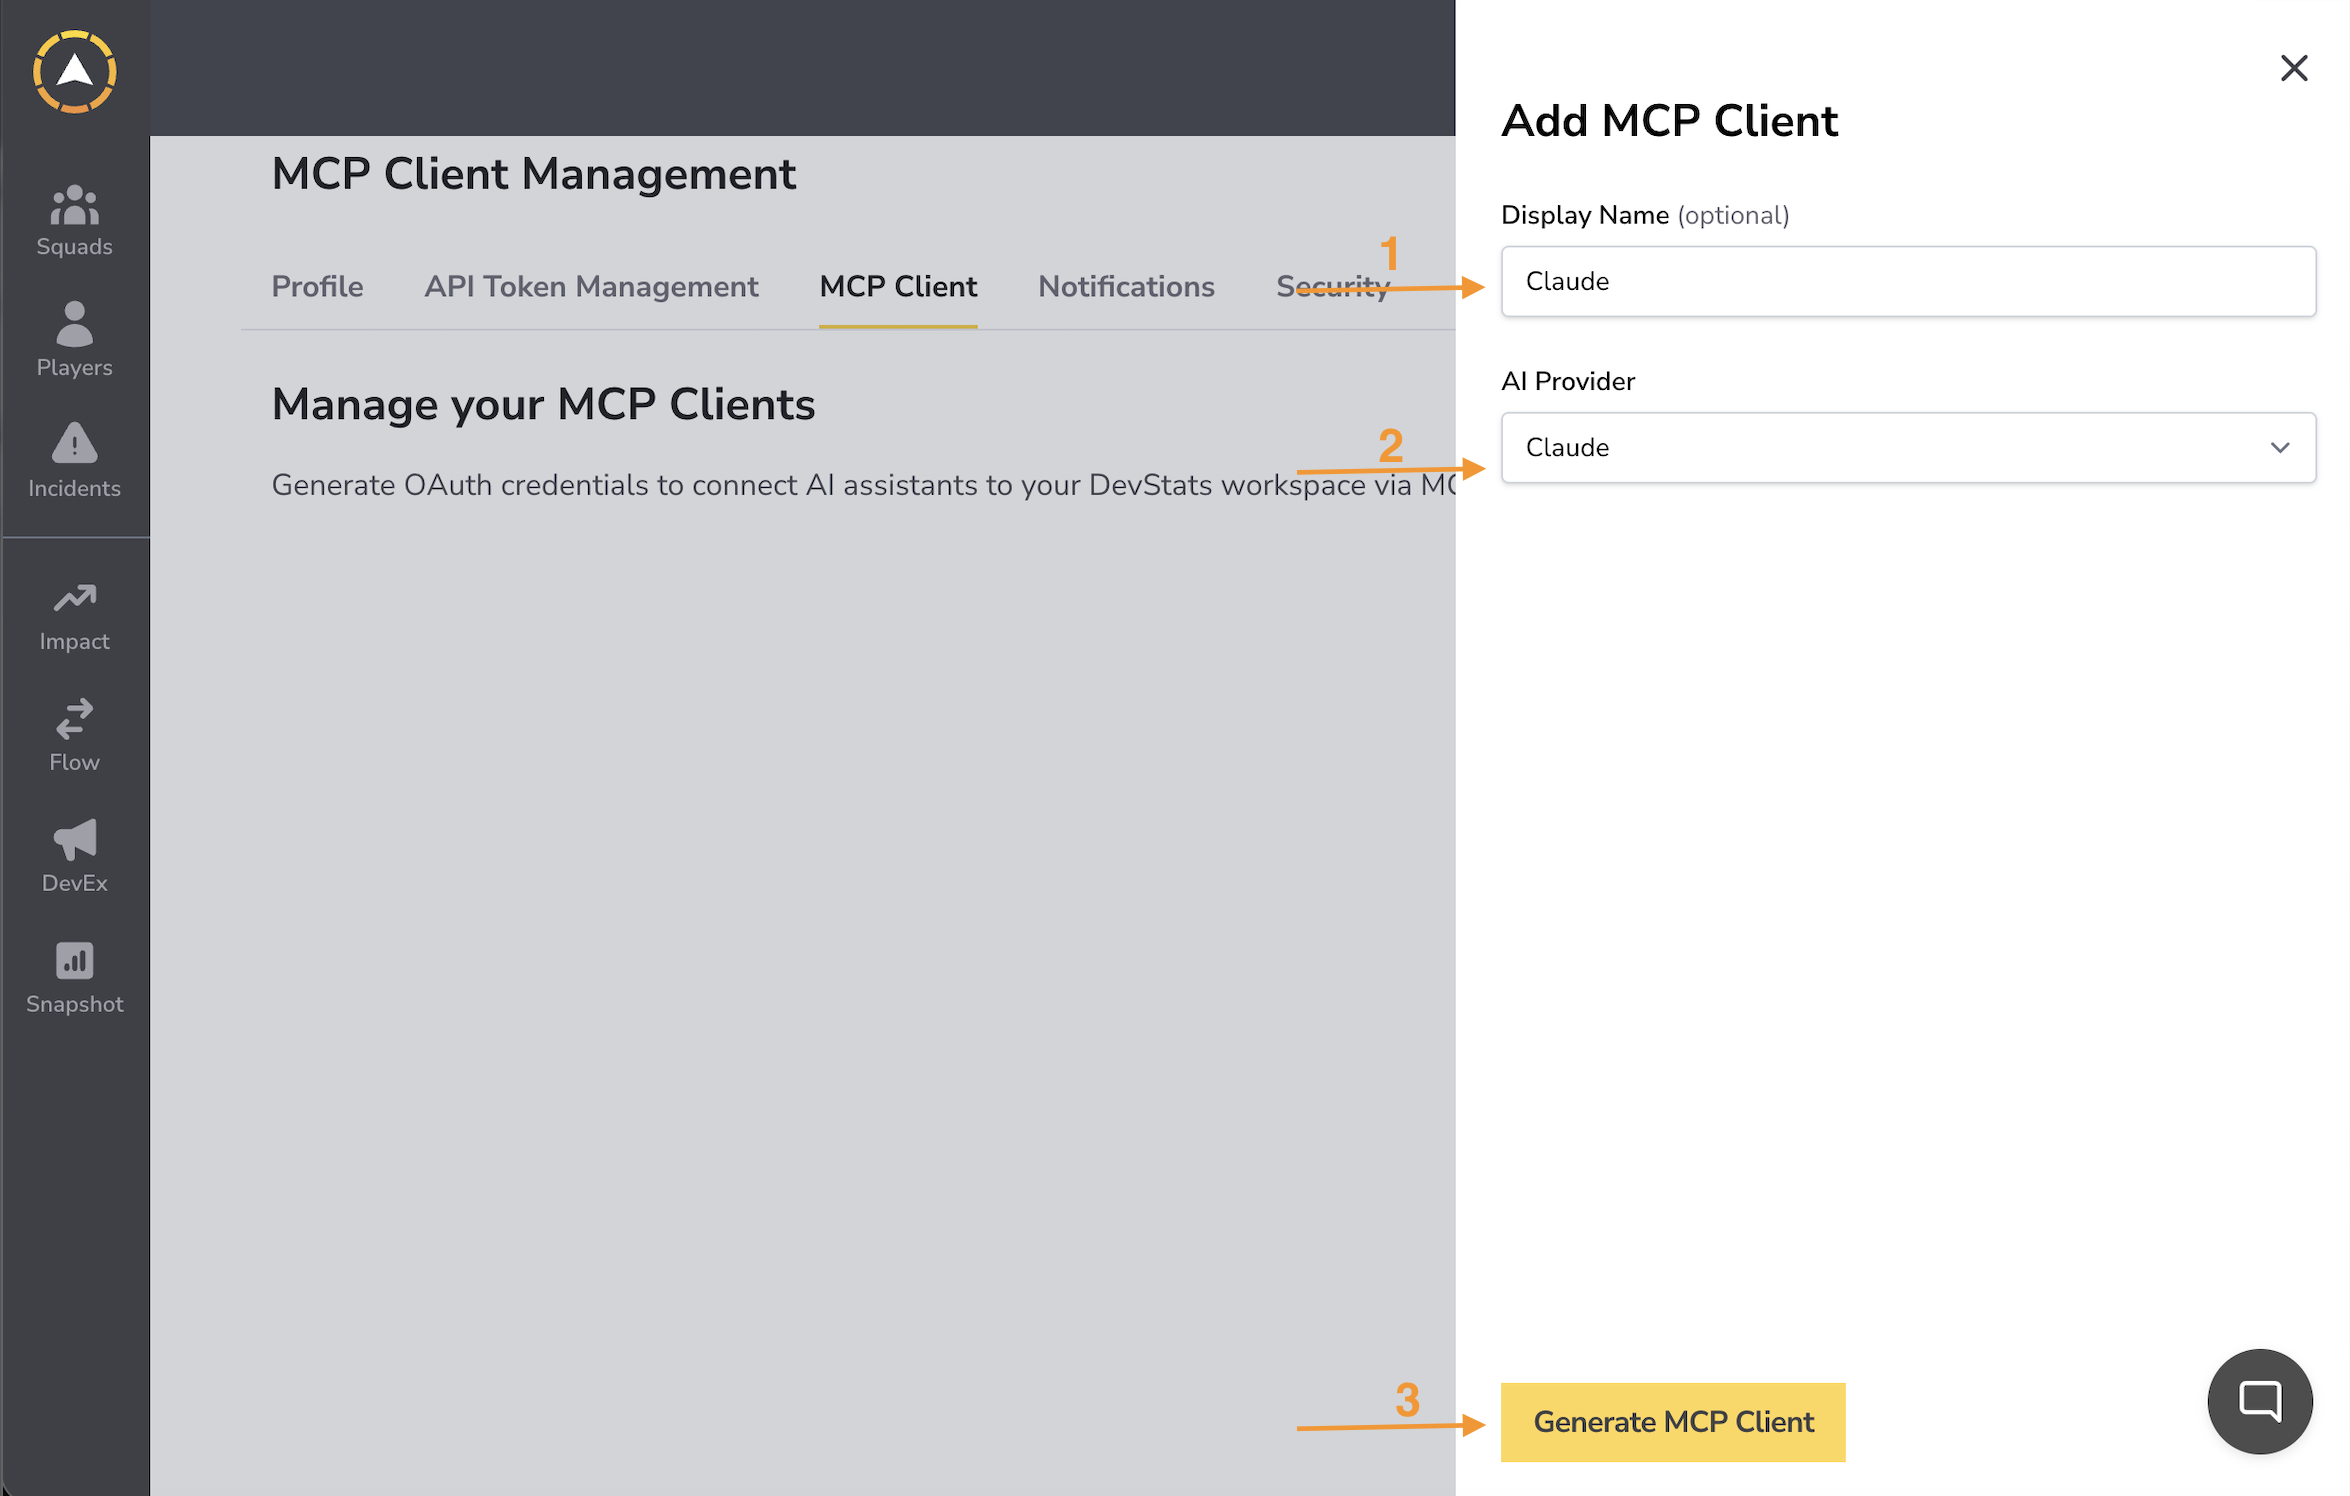
Step 2: Click Add MCP Client. Optionally add a display name, then select Claude as the AI provider from the dropdown. Click Generate MCP Client.
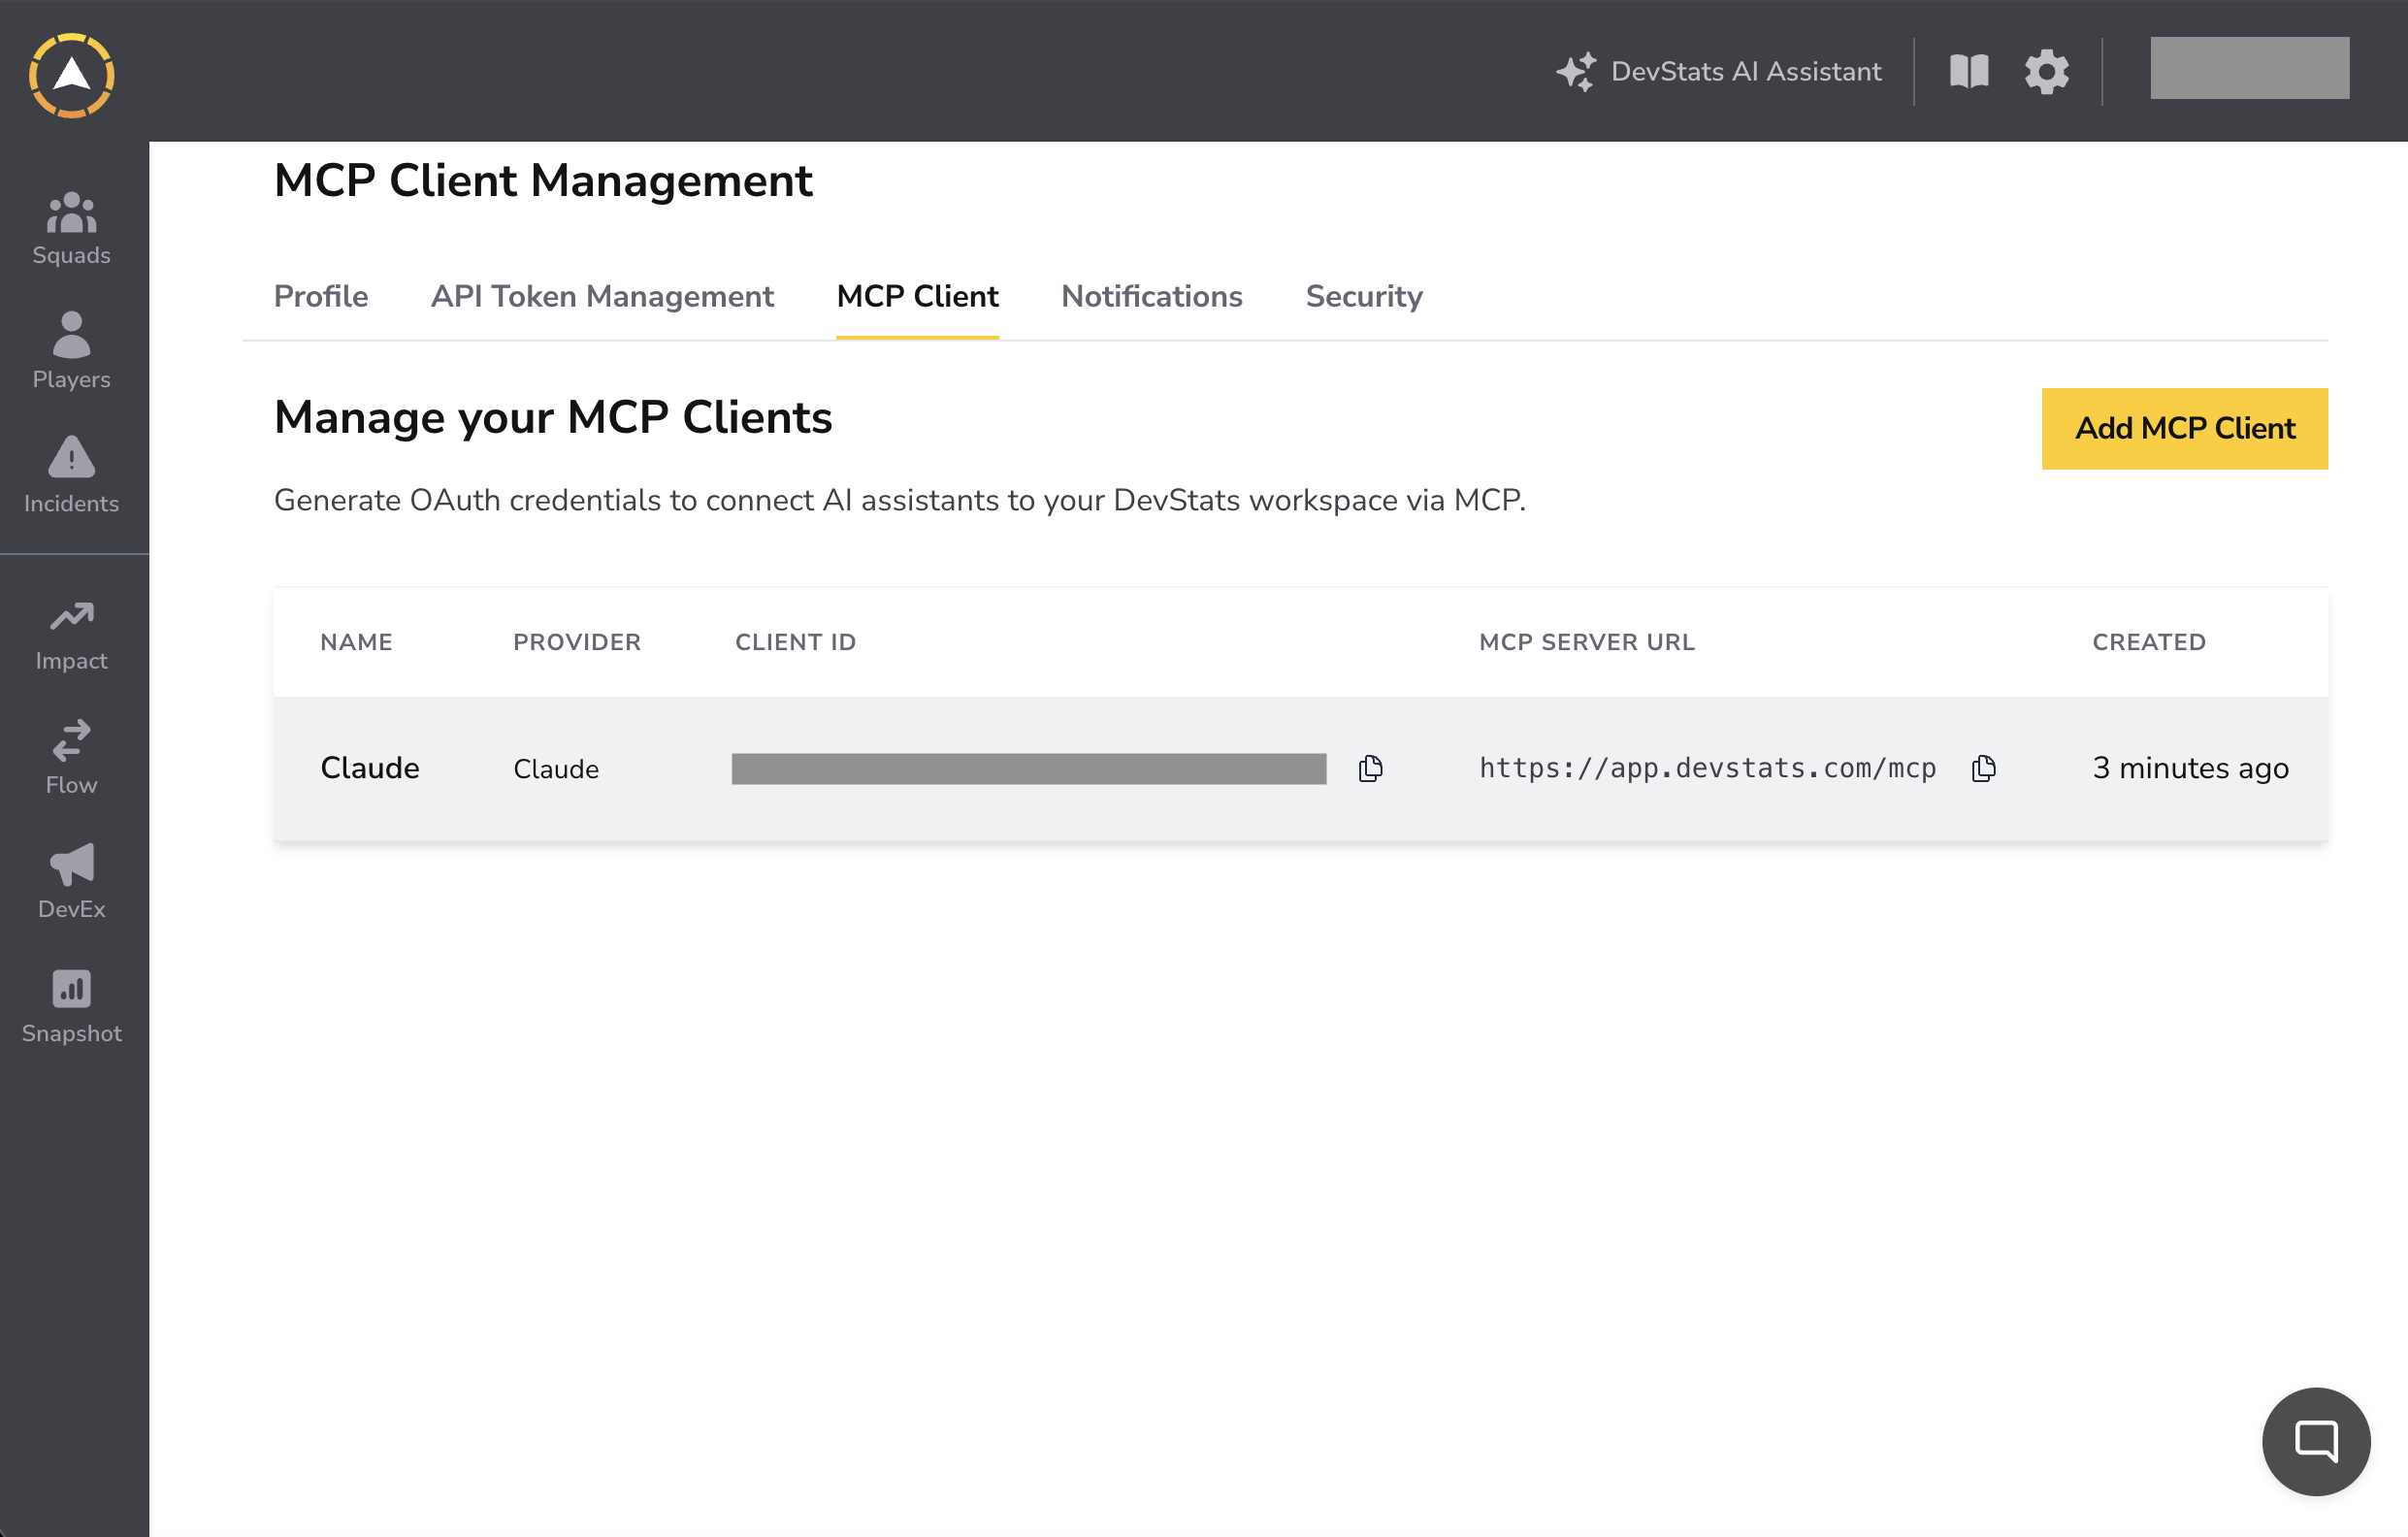
Step 3: Your MCP client has been created. Click Copy and Close to save your Client Secret, you will not be able to see it again after closing this dialog.
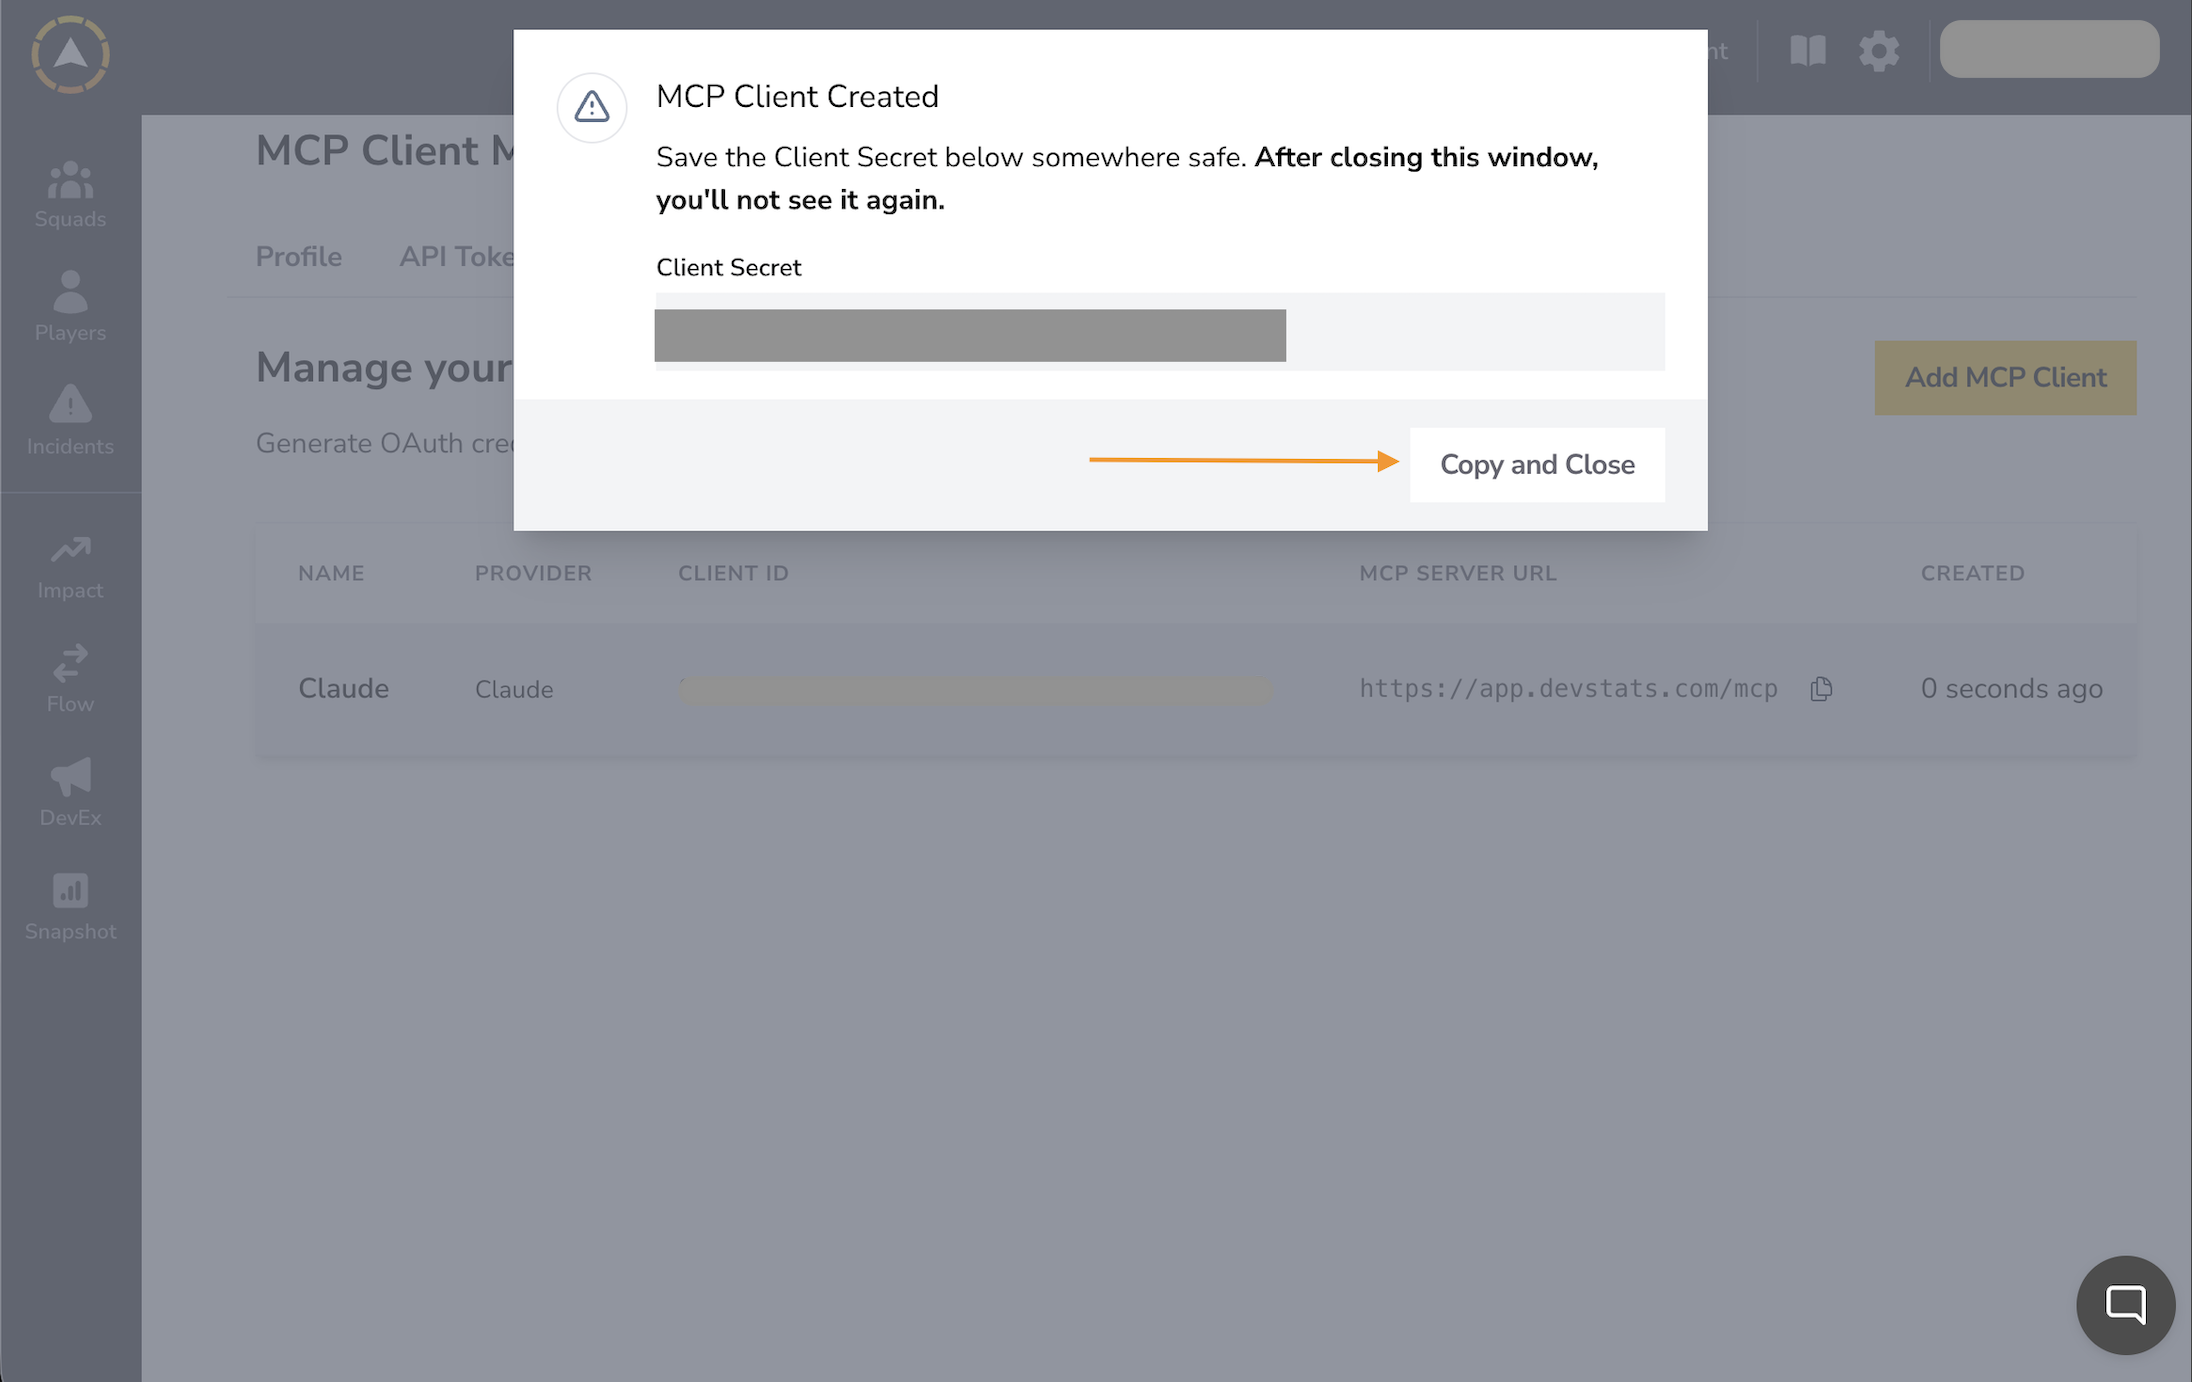
Step 4: After closing, your MCP client details (name, provider, Client ID, and MCP server URL) will be available in the MCP Client tab.
Connecting Claude
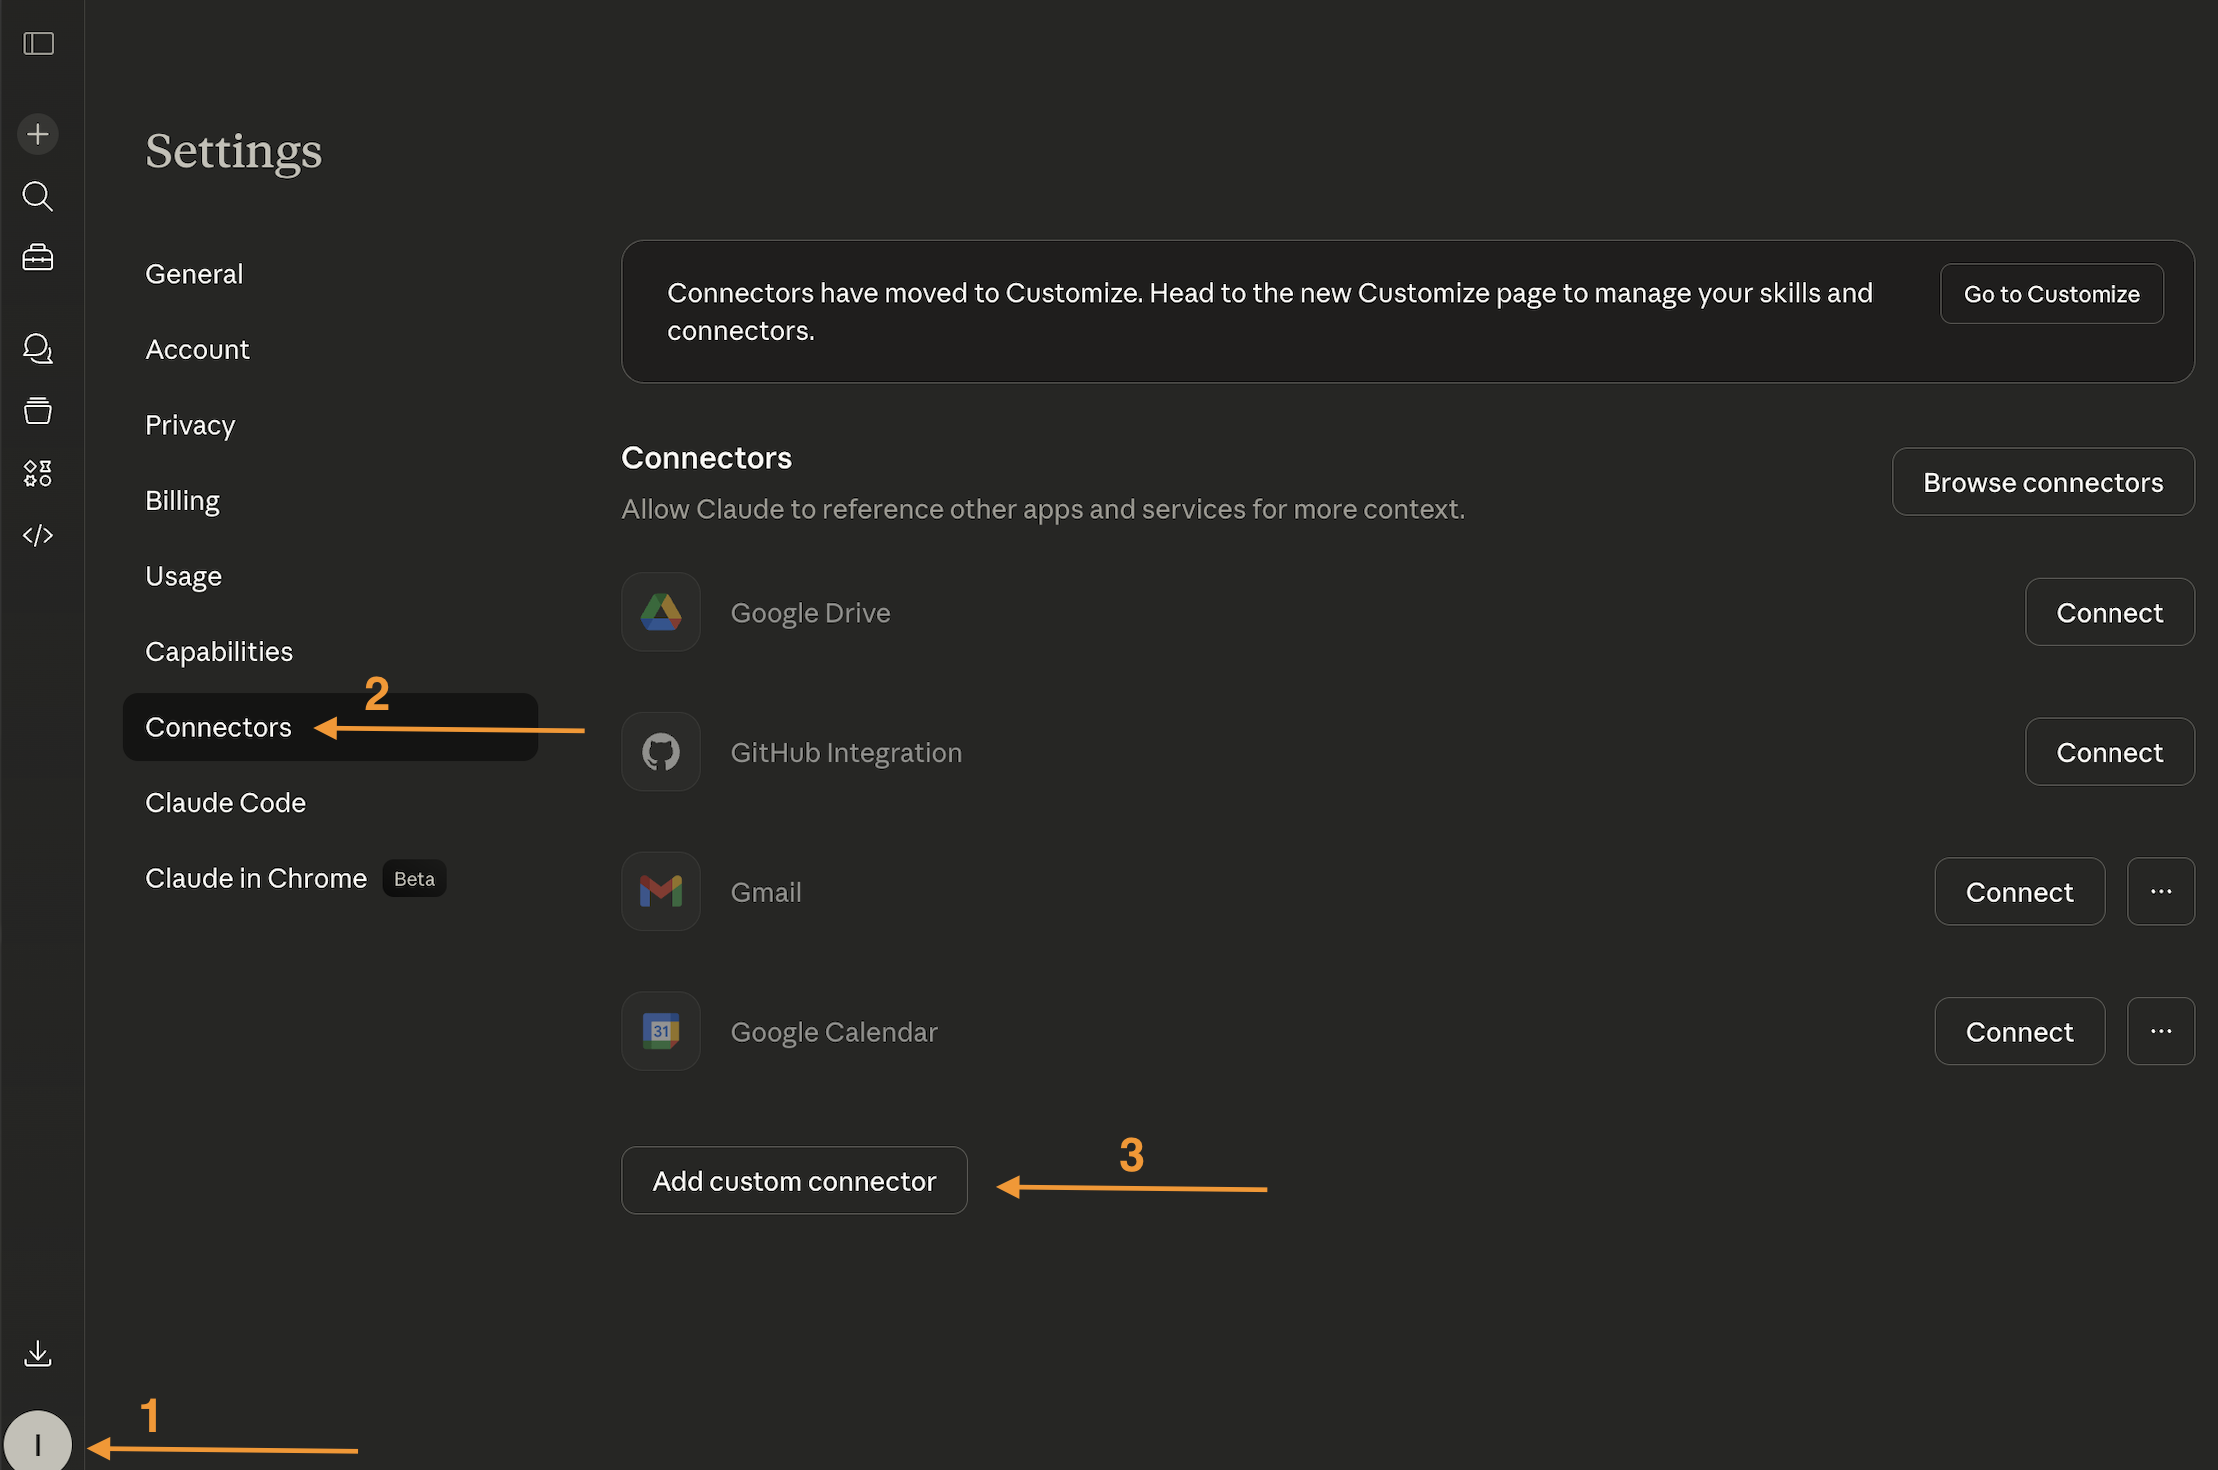
Step 1: In Claude, go to Settings and click Connectors in the sidebar. Click Add custom connector.
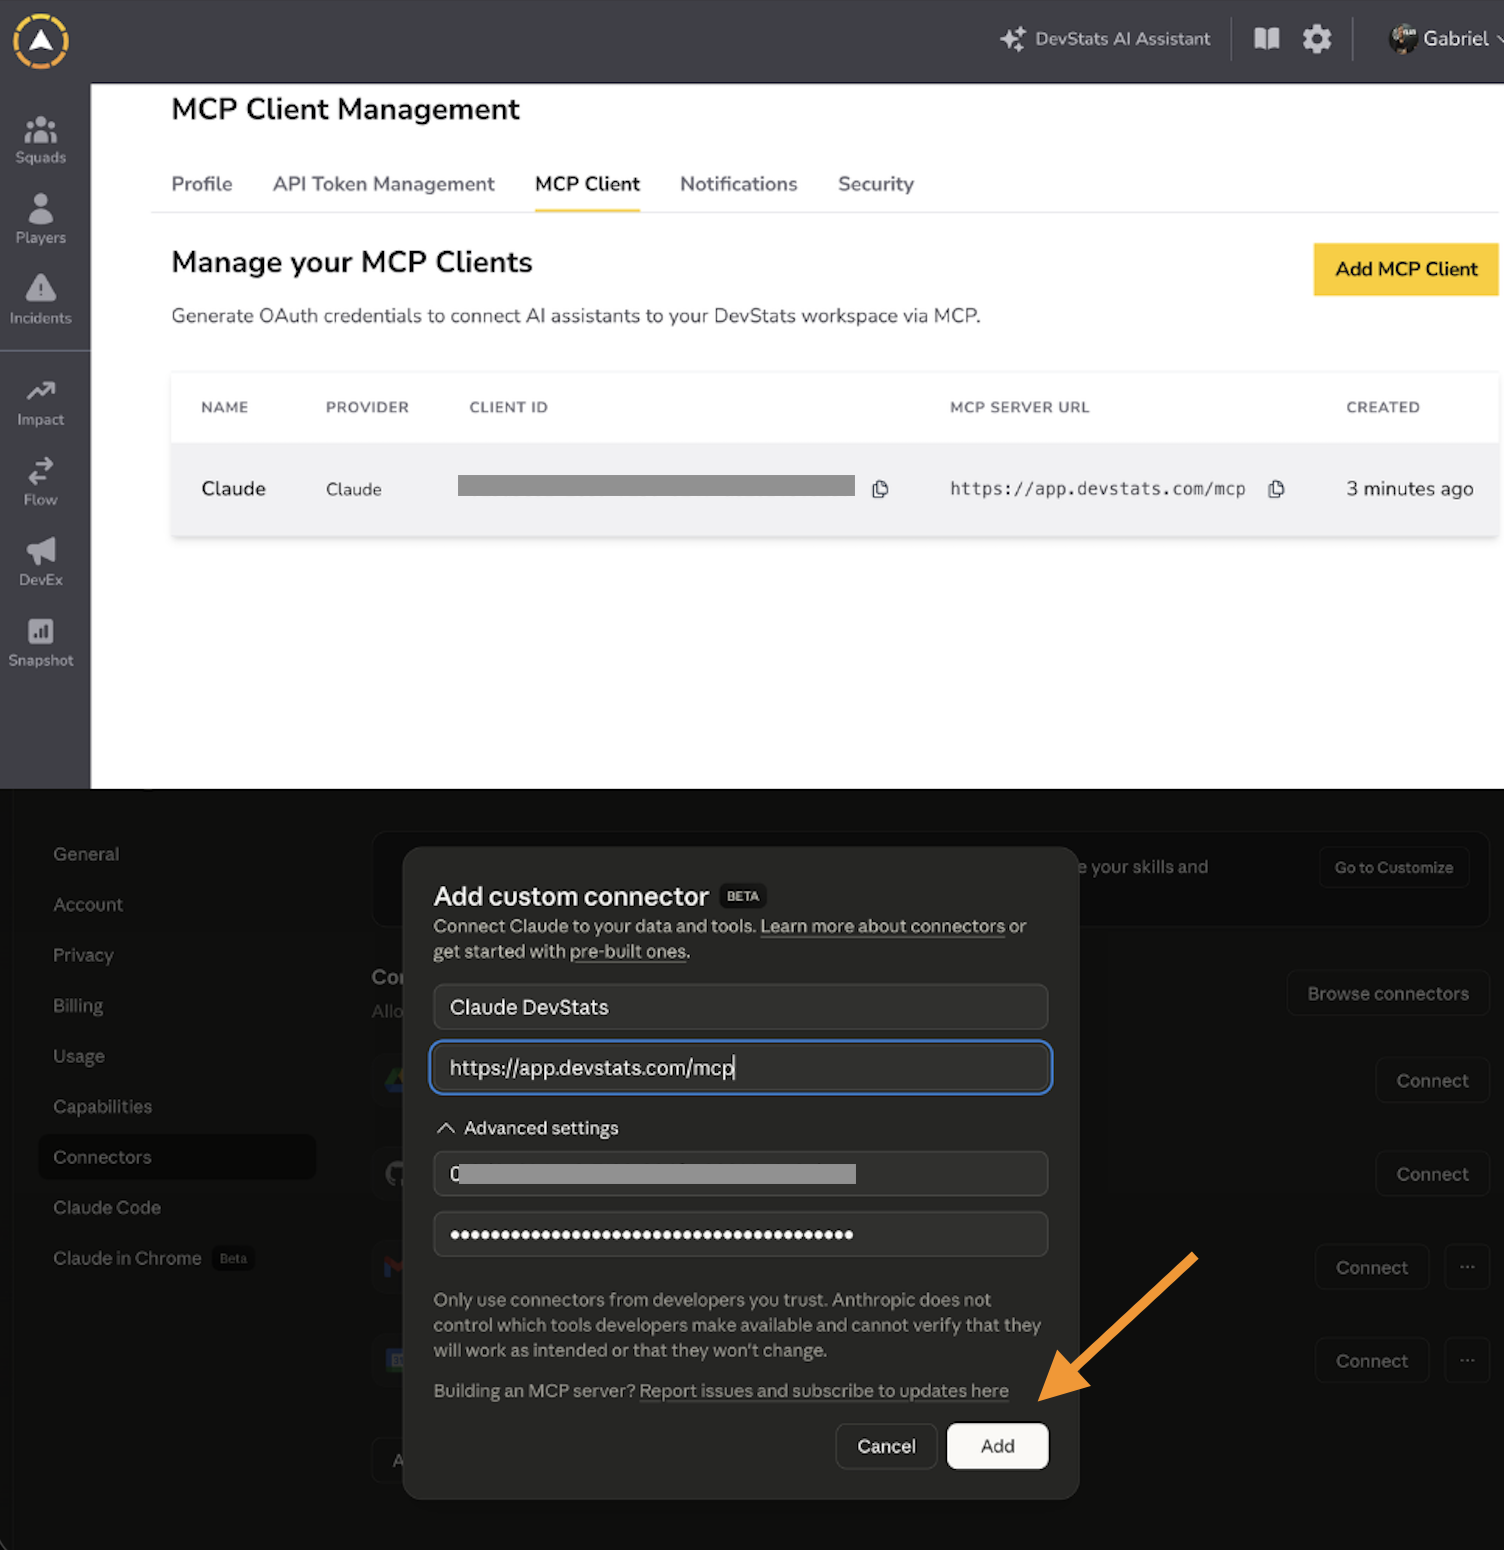
Step 2: Fill in the connector fields using the credentials generated in DevStats: name, MCP server URL (https://app.devstats.com/mcp), Client ID, and Client Secret. Click Add.
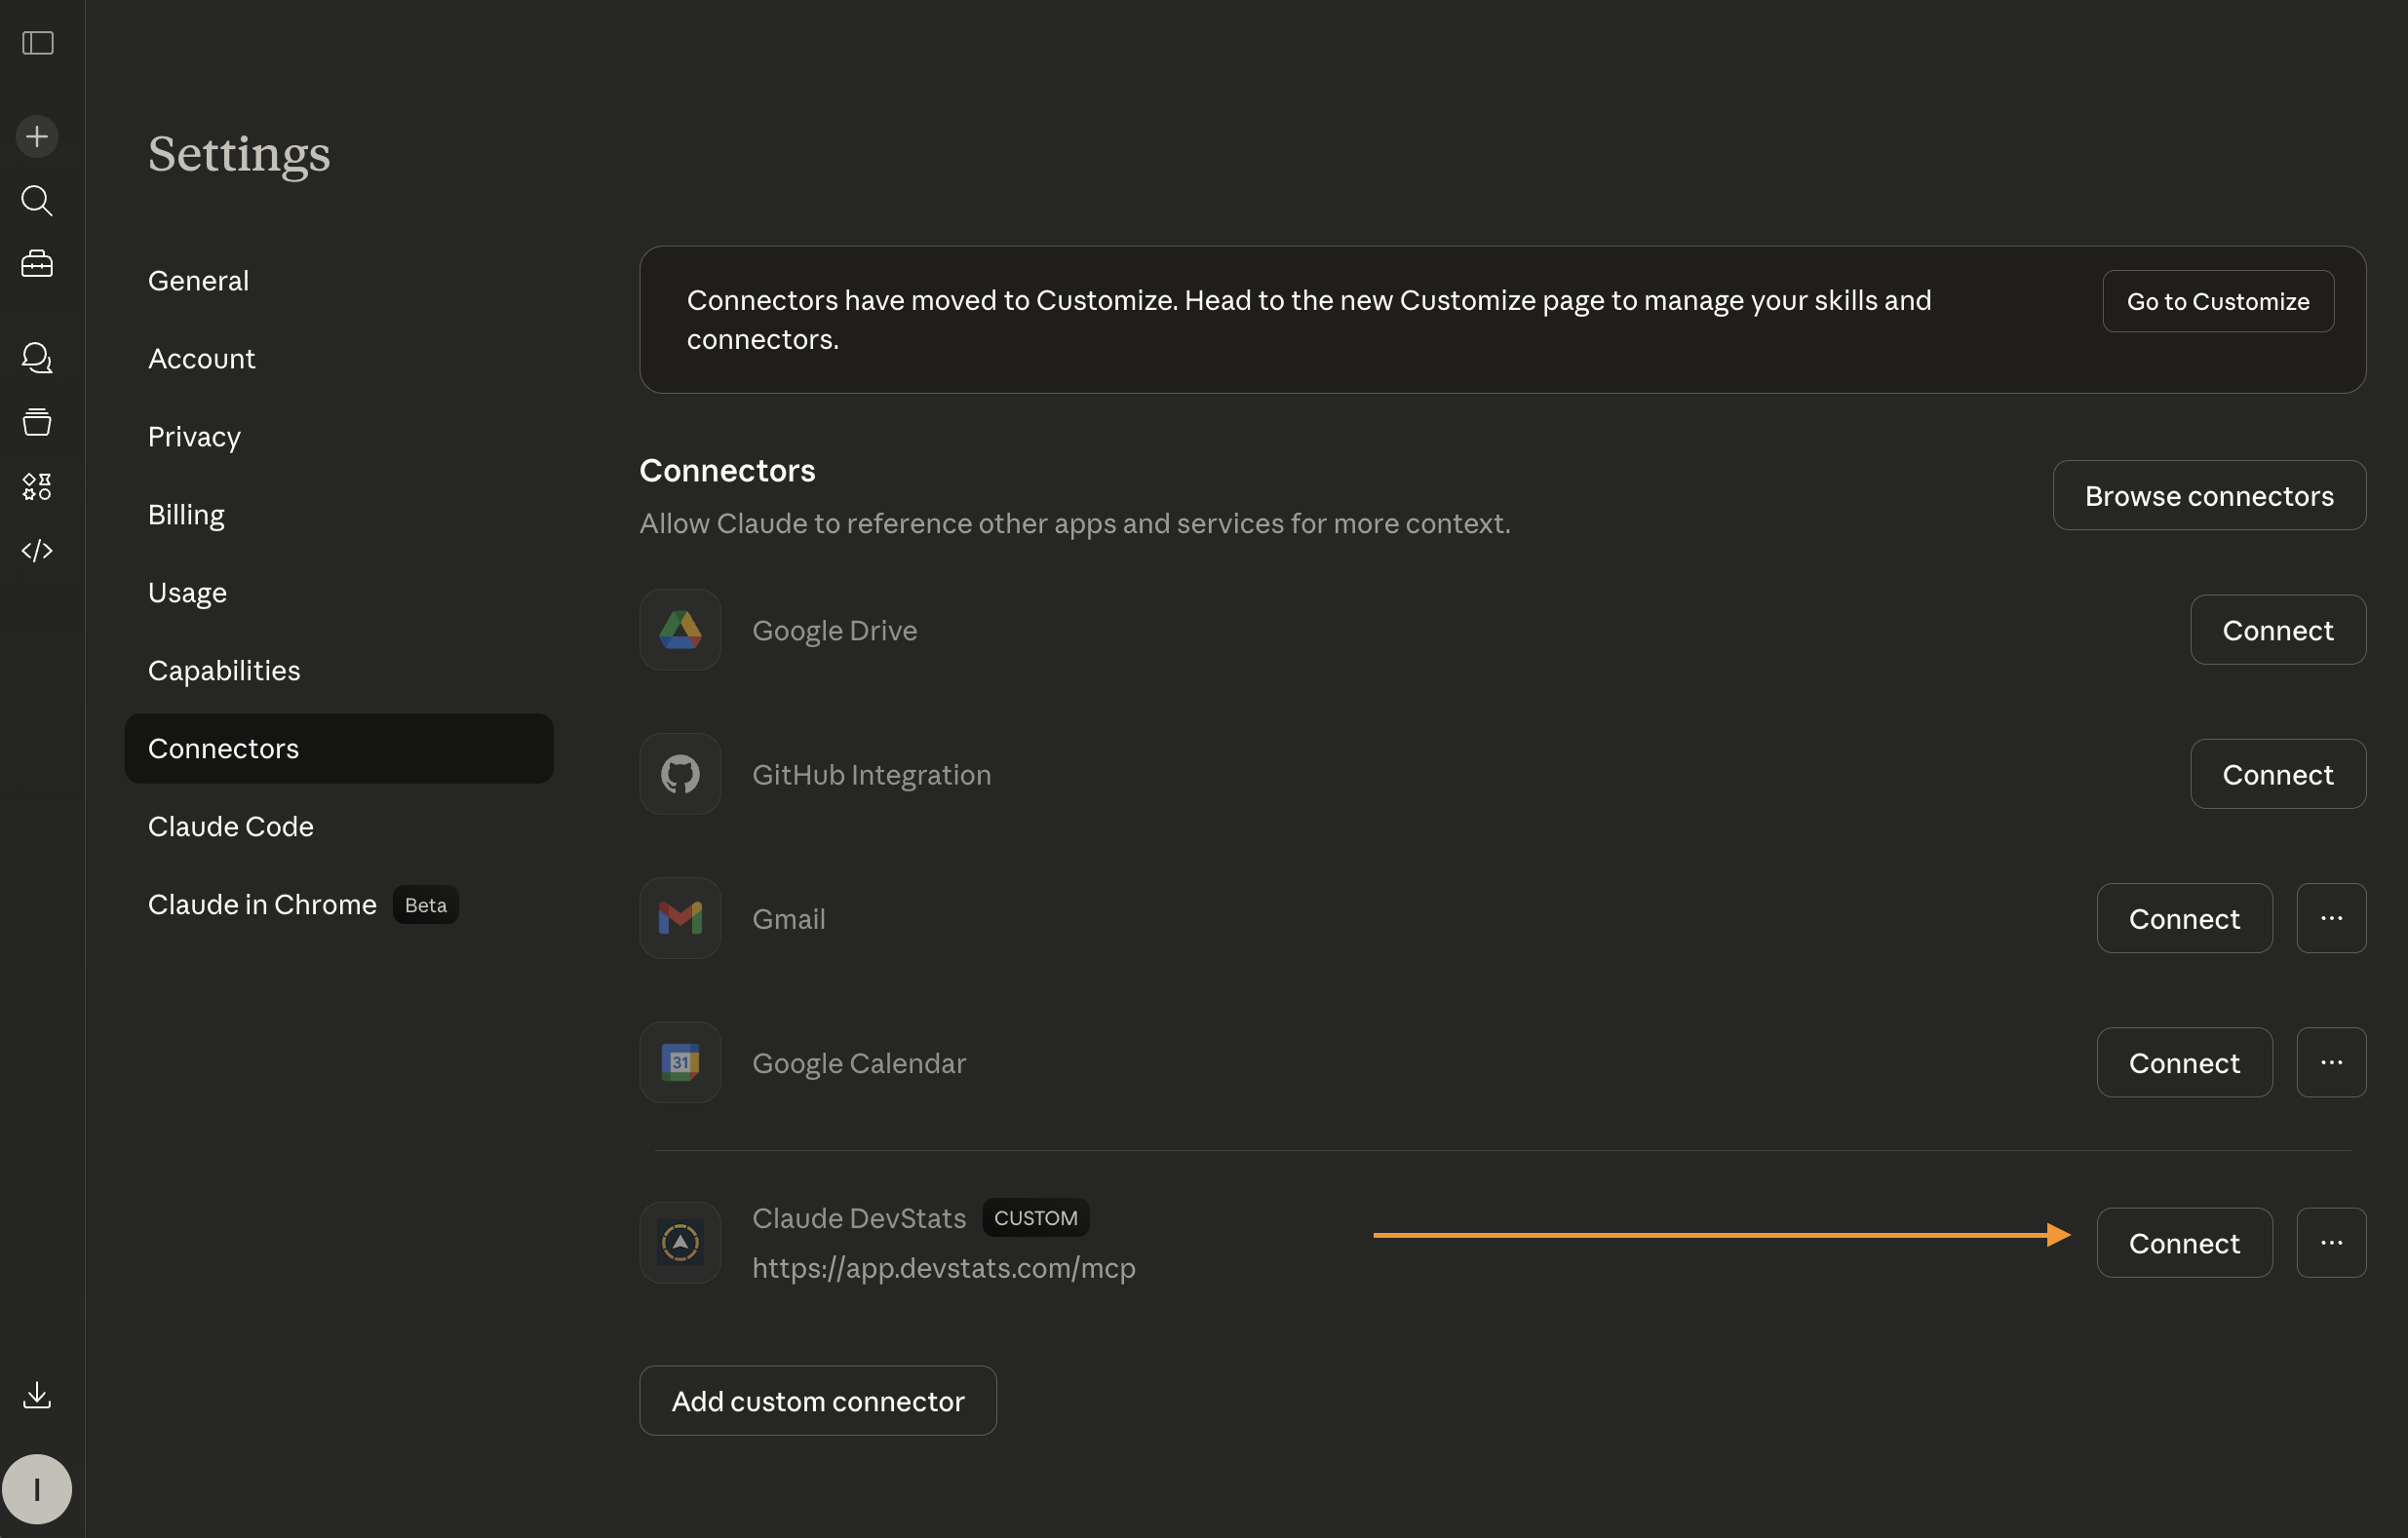
Step 3: Back in the connectors list, click Connect next to the connector you just created.
Step 4: A DevStats authorization screen will appear. Click Authorize to allow the connection.
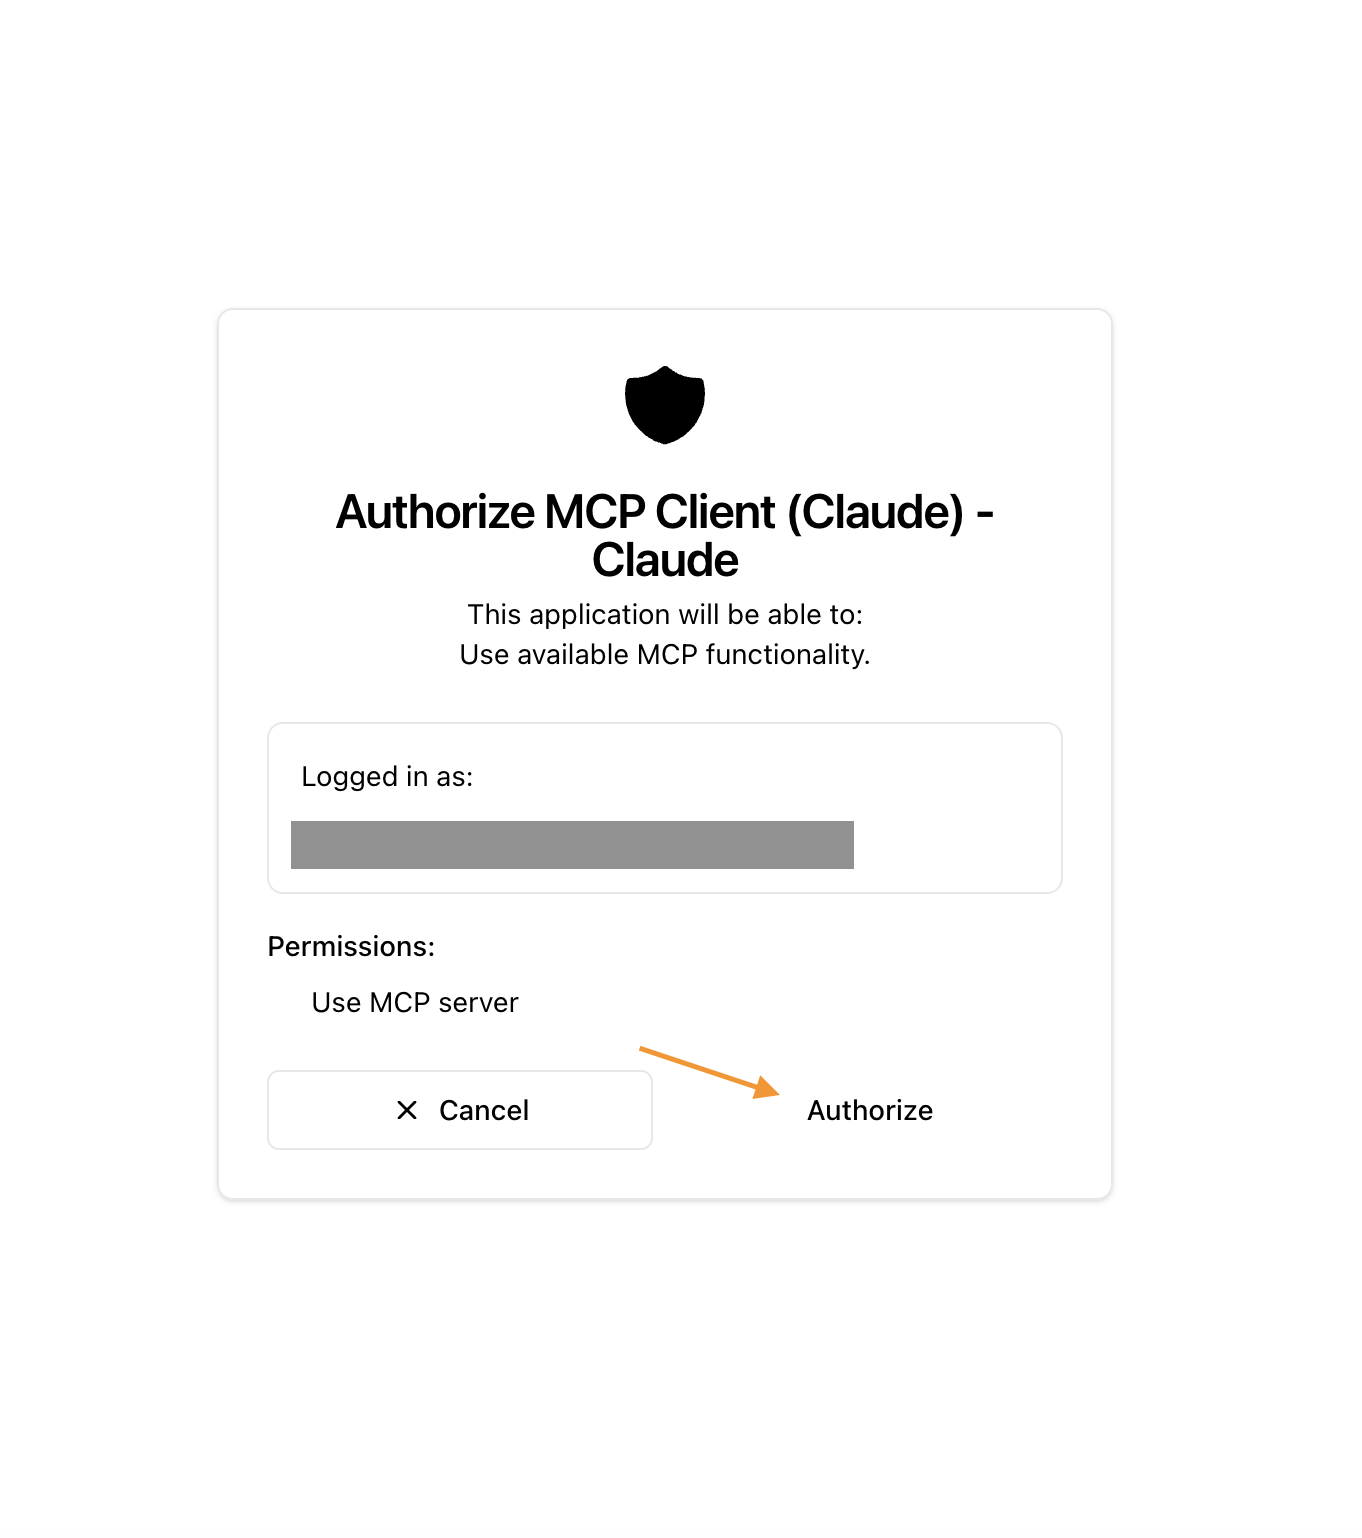
Step 5: Once authorized, the connector will show as connected.
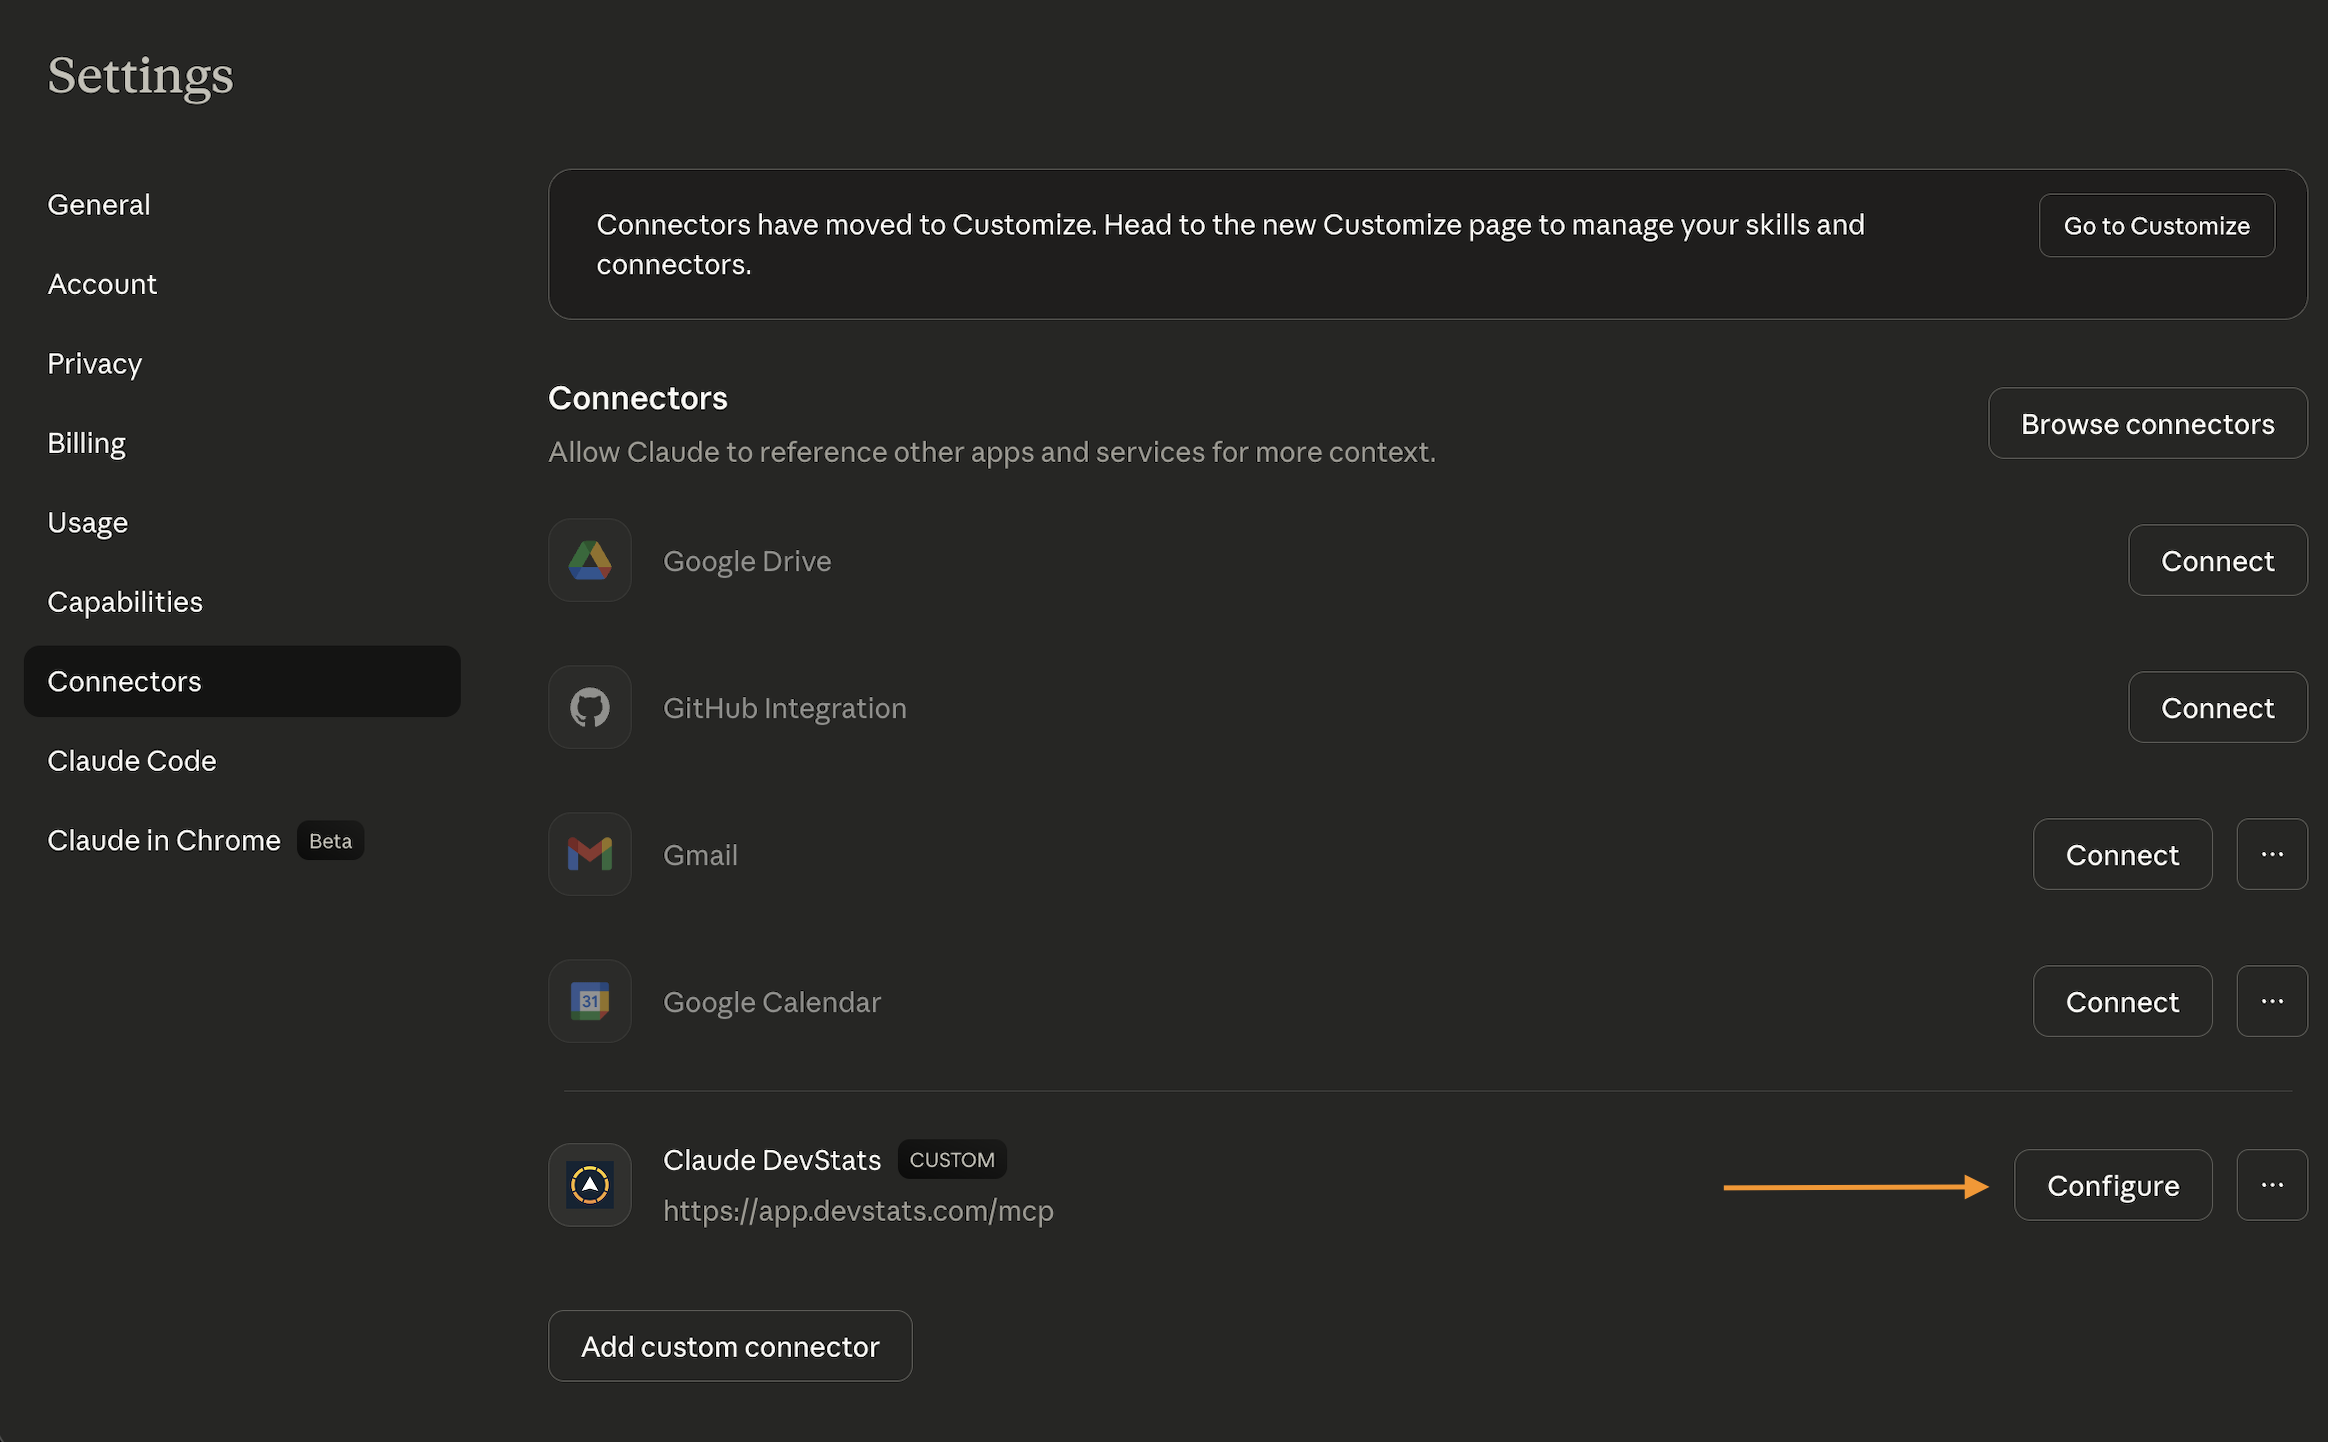
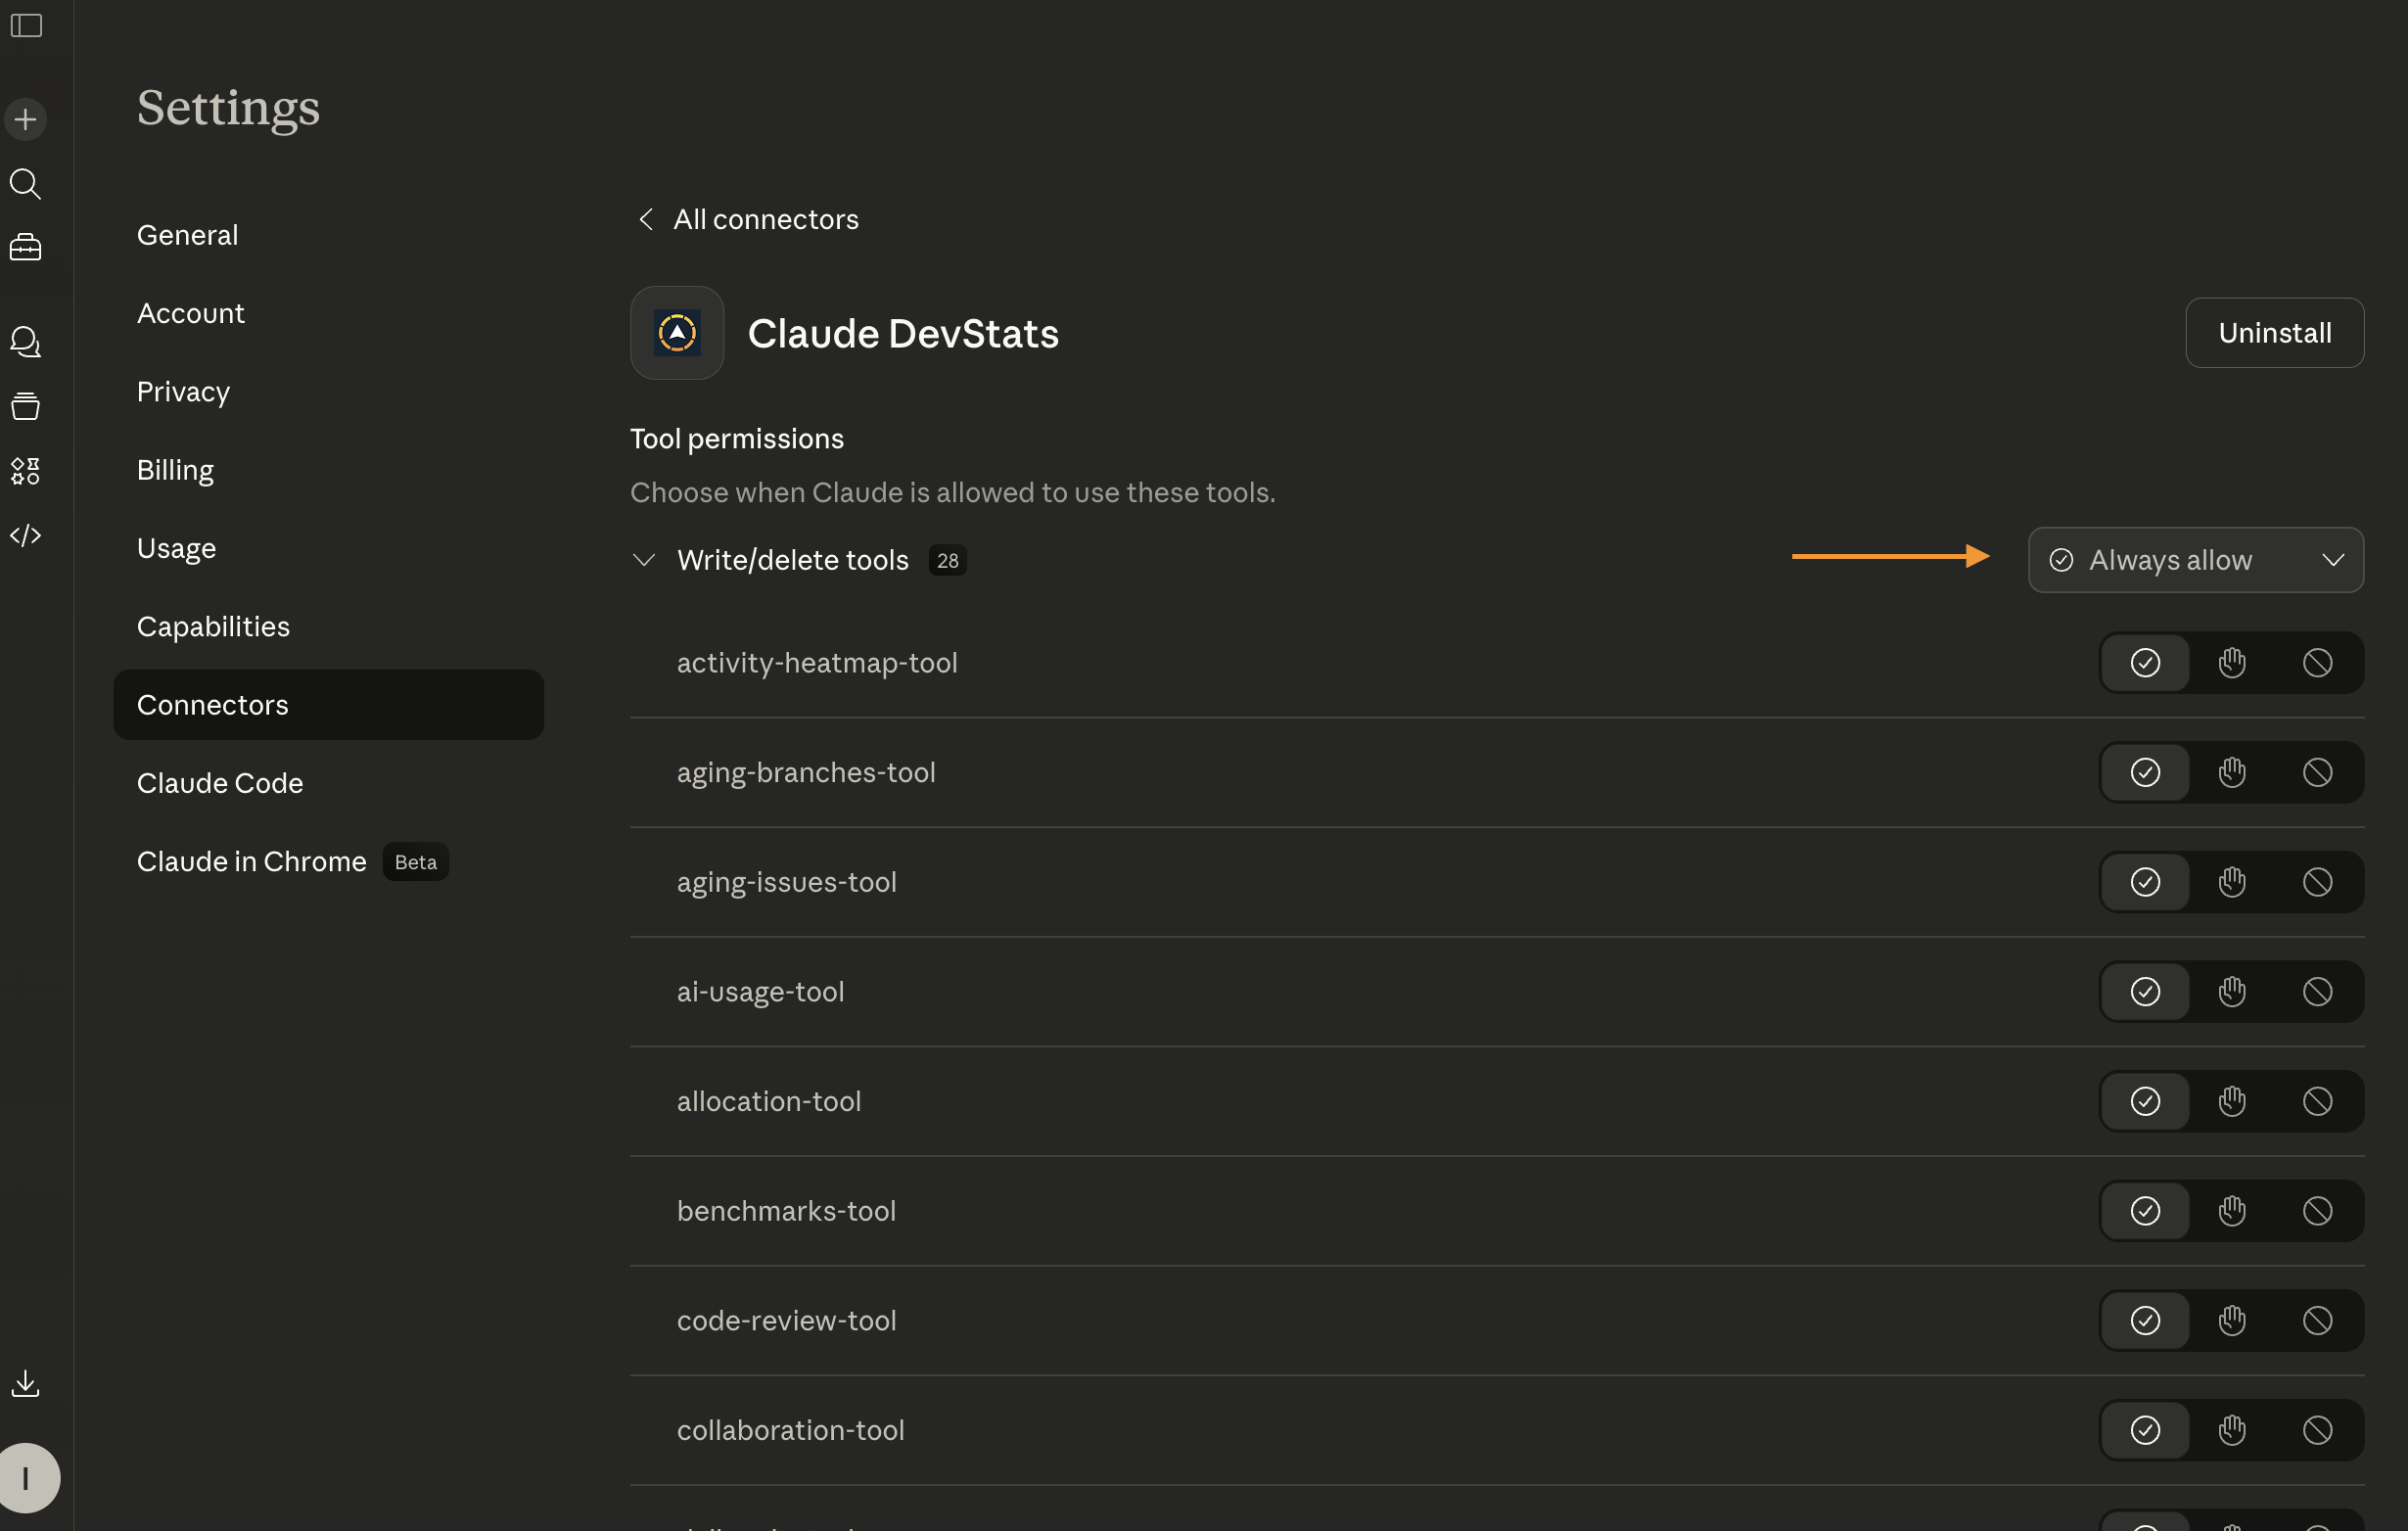
Tip: Click Configure on the connector and enable Always allow to prevent Claude from asking for permission on every request.
That's it. You can now ask Claude questions about your DevStats workspace, such as:
- "What is the PR Cycle Time for my team in the last 30 days?"
- "List all players in the Engineering squad."
- "Show me the DORA snapshot for this week."